Unlocking success: The importance of preparation in your tiling project

Whether you’re a seasoned pro with years of experience installing porcelain tiles or you’re just dipping your toes into the world of tiling, one thing remains undeniable: the impact that this material can bring to a space. From the heart of the home in the kitchen to the serene sanctuary of the bathroom, and even extending to outdoor areas, porcelain tiles offer an unparalleled versatility in enhancing environments. Their allure lies not only in their aesthetic appeal but also in their durability and low maintenance requirements.
Yet, as resilient and adaptable as porcelain tiles are, the process of installing them demands careful attention and meticulous preparation. Rushing through this task without a well-thought-out plan and the necessary groundwork can jeopardise the longevity of the installation. Ensuring the survival of your tiles against the challenges of sudden spills and constant foot traffic requires patience and precision.
Therefore, it’s essential to approach the installation of porcelain floor tiles with care and preparation. In this comprehensive guide, we’ll walk you through the step-by-step process of installing porcelain floor tiles, equipping you with the knowledge and skills needed to create a lasting foundation for your space.
Correct preparation of the subfloor or laying surface will determine the success or otherwise of your project. The laying surface should be rigid, non-flexing and capable of supporting the expected load with minimal or no deflection. A level subfloor is extremely important in order to keep tiles from cracking. Sanding high spots and the use of a levelling compound on low spots is essential. It is also important that your tiles are clean and dry, if necessary wash them with clean water and dry them thoroughly before fixing.
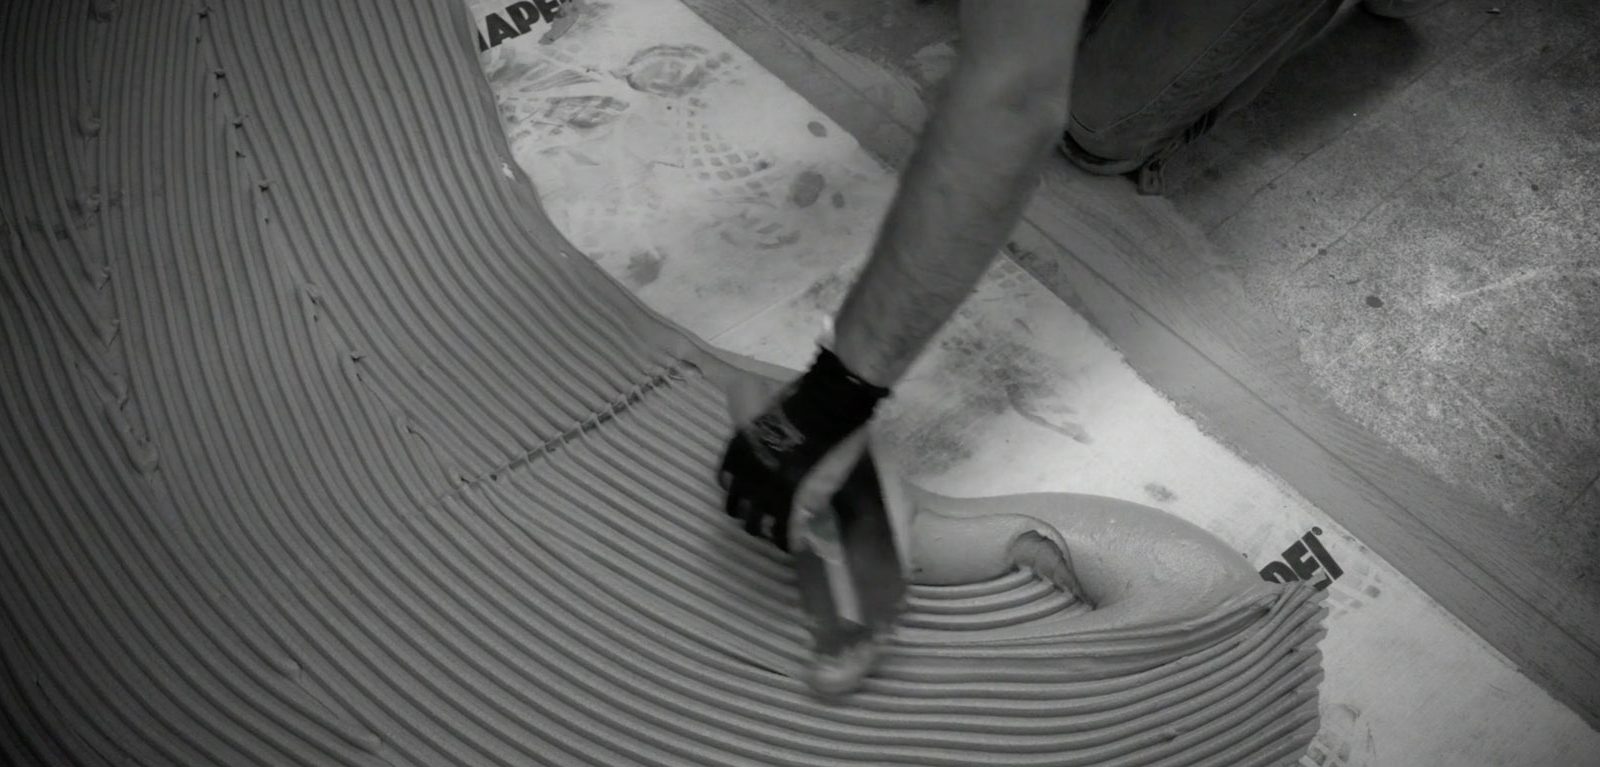
Once your subfloor is clean and dry, spread the adhesive on the surface to be covered with a 10 x 10 mm square toothed trowel, across an area of 5 – 10 cm more than the dimensions of the tile. Always apply the adhesive in stripes running parallel with the short edge to ease getting rid of air pockets and bubbles. By using this method, full coverage of the tile with adhesive is ensured.
Large format porcelain slabs always require back-buttering. Back-buttering describes the process of applying a layer of adhesive to the back of the tiles using a trowel. You can view our pre-delivery guide here. Use a 10 x 10 mm square toothed trowel for applying adhesive to the wall or floor and when back-buttering use a 3 x 3 mm square toothed trowel for the back of the tile. The sum of the two trowels notch sizes should equal or be greater than 13 mm (3 mm + 10 mm = 13 mm).
The tile should be firmly pressed into the adhesive along a straight edge, collapsing all adhesive ridges. Use a levelling system to avoid lippage and frequently check that your tiles are even using a suitable box level. Levelling systems are available with 1 mm, 2 mm and 3 mm tile spacers. Please note that under no circumstances should “spot bonding” be used with porcelain tiles.
Periodically check the tiles backs to make sure there is full contact between the adhesive and tile. If not apply additional adhesive to the tile or use a troll with larger notches in your adhesive. As you are working wipe off excess mortar with a wet sponge.
We recommend adhesive and tile laying products from Mapei and Ardex:
 Mapei is a proud innovator of environmentally responsible solutions and a manufacturer of more than 150 LEED© compliant products, the industry’s largest selection of eco-friendly products.
Contact
Mapei House
Steel Park Road
Halesowen
West Midlands B62 8HD
01215 086970
info@mapei.co.uk
www.mapei.co.ukAdhesive Products
- Water dispersion based adhesives
- Acoustic installation systems
- Cement based adhesives
- Elastic sealants
- Hydraulic setting adhesives
- Primers
- Reaction resin adhesives
- Ready mixed adhesives
- Substrate preparation
- Waterproofing
View the full range of Mapei adhesive products here.
Browse the Mapei Catalogues and technical brochures (PDF) here
 Ardex manufacture a comprehensive range of floor and wall tile adhesives, from convenient ready for use products, to powder based adhesives designed specifically for use with large format tile installations.
Contact
Ardex UK Ltd
Homefield Road
Haverhill
Suffolk CB9 8QP
01440 714939
info@ardex.co.uk
www.ardex.co.ukAdhesive Products
- Flexible wall & floor tile adhesive
- Pourable floor tile adhesive
- Ultra rapid setting wall & floor tile adhesive
- Ultra rapid setting semi-pourable floor tile adhesive
- Rapid setting flexible tile adhesive
- Ready mixed wall tile adhesive
View the full range of Ardex floor and wall tile adhesives here, you can also use their “Cost Calculator“.
Disclaimer
This information should be considered to be informal and non-binding. The products must be used according to local conditions and materials. Manufacturers instructions must be read carefully and followed closely. Always test the products in an inconspicuous area.
We cannot accept any responsibility for reliance placed upon the advice contained herein since practical expertise and site conditions are outside of our control. Neither do we accept liability for the performance of the product arising from such use. This does not affect your statutory rights.